How to Install & Maintain PoE Security Cameras(Outdoor & Indoor)?
Properly installing and maintaining security cameras is essential for effectively safeguarding your property and having peace of mind. POE cameras offer convenient installation and reliable performance by combining power and data transmission over a single Ethernet cable.
In this guide, we will walk you through the step-by-step process of installing POE security cameras, such as camera placement, wiring, and configuration.
Additionally, we will provide tips on how to effectively maintain your POE cameras systems to maximize their longevity and optimize their performance.

Plan Camera Location
Determine the areas you want to monitor, such as the driveway, front door, side entrances, and potentially the backyard if necessary.
Decide whether you will mount the cameras on the side of your house, under the soffit, or in areas with potential sunlight glare.
Consider the height of the installation location and use a ladder for accessibility. Mounting underneath the soffit using an aluminum bar is a common technique.
Typically, four cameras can cover a rectangular or square house. Adjust the camera's position and angle to achieve the desired view. Use the camera's mechanisms (if available) to tilt, pan, or rotate the camera for optimal coverage.
If your camera has additional power options(besides POE), ensure a stable power source is available nearby. Connect the camera to the power supply following the manufacturer's instructions.
Mounting
Before mounting the camera, perform a test fit to ensure it fits properly in the desired location. Verify that the camera can be moved vertically and horizontally as needed.
Depending on the camera type and location, choose the appropriate mounting method. For outdoor cameras, wall mounting or pole mounting may be required, while indoor cameras can be ceiling-mounted or can be isnatlled at any flat surfaces.
Consider the strength of the mounting surface (e.g., soffit) to determine if anchors are necessary.
You can use an aluminum bar or bracket to mount the camera. Drill holes in the bar for cable passage and secure it with screws or nuts. Attach the camera securely to the mounting surface using screws or security bits.
Use the provided template or guidelines for drilling holes and attaching screws. Ensure the bracket is firmly attached. Spray paint the bar(bracket) to match it with the surroundings if desired.
Termination, Splicing & cable management
Terminate the Ethernet cable to a male connector or keystone jack using appropriate tools like crimpers and strippers. Use CAT ethernet connectors according to the cable & systems requirement.
Also spare some extra cable length in case of future adjustments or repairs. Feed the cable through walls or ceilings to reach a central location where your NVR (Network Video Recorder) will be located.
Watch tutorials or follow guides for proper splicing techniques because secure connection is crucial for maintaining a reliable connection.
Power over Ethernet (PoE) wiring allows power and data to be transmitted over a single Ethernet cable.
The process involves connecting the POE switch to the network router, running Ethernet cables from the switch to each camera, and ensuring proper power delivery.
The PoE switch acts as the power source, providing the necessary power level to the cameras. Cable length, quality, and wiring configuration should be considered for optimal performance.
Use stickers or labels to mark and manage the Ethernet cable's position and route. Consider using fiber rods or similar tools to facilitate cable installation in challenging areas such as the attic.
Network Configuration
To set up a network configuration for PoE security cameras, first determine the number and locations of the cameras to determine the necessary switches and cables.
Select PoE switches that meet your requirements. Connect the PoE switch to your router or network switch using an Ethernet cable.
Run Ethernet cables from the switch to each camera location and connect them. Assign static IP addresses to the cameras for easier management.
Power on the switch and ensure all cameras have power and connectivity. Configure port forwarding on your router for remote access. Enhance security by changing default credentials, enabling encryption, and updating firmware.
Consider installing dedicated camera management software for larger camera setups. Consult camera manuals for specific instructions as processes may vary. However make sure that the installation & configuration can vary depending on the model & the manufacturer.
Setting up system
After installing PoE security cameras, it is crucial to configure important settings such as user accounts, passwords, video settings, recording settings, notifications, and remote access options for enhanced security and functionality.
These settings include user authentication, video resolution, motion detection, storage duration, event notifications, and enabling remote access either through port forwarding or cloud services.
Time and date synchronization, privacy settings, firmware updates for new features and security patches. Consult the user manual for specific instructions as settings can vary.
Test and Verify
To test and verify the installation of PoE security cameras, start by powering on the PoE switch and checking its connection to the network. Then, ensure each camera is receiving power and has a stable network connection.
Access the camera feeds using a web browser or camera management software, and test camera functions like pan, tilt, and zoom. Evaluate the video quality, test recording and storage capabilities, and check remote access if configured.
Verify motion detection and alerts, integration with other security systems, and conduct a comprehensive system test to ensure proper functionality and meet surveillance requirements.
For outdoor Installation
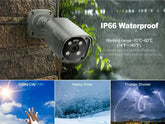
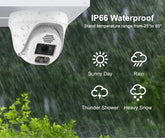
Choose a camera specifically designed for outdoor use. An IP65 or higher, indicates they are weatherproof and can withstand various environmental conditions. When installing security cameras outdoors, it is essential to choose weatherproof cameras with a suitable IP rating for protection against dust, moisture, and extreme temperatures.
Position the cameras strategically, considering the field of view, angle of coverage, and distance limitations. Install cameras at suitable heights to prevent tampering or theft.
Consider the camera's field of view, angle of coverage, and potential obstructions like trees or walls. Use high-quality outdoor-rated Ethernet cables and protect the connections with waterproof junction boxes or conduit.
Consider lighting conditions, avoiding direct exposure to strong light sources. Regularly inspect and clean the cameras, check the mounting brackets, and ensure network equipment is suitable for outdoor use or protected in weatherproof enclosures.
Common mistakes while installing security cameras
Installing infrared cameras in the wrong places or areas where the infrared beams are blocked, resulting in overexposed images in low light conditions.
Forgetting to remove the protective film or foam from the camera, leading to image clarity problems after installation.
Setting up cameras at an incorrect angle, wasting the field of view and compromising security.
Ignoring distance limits of wires, exceeding the maximum distance of 100 meters for UTP cabling over Ethernet, which can cause data and power loss.
Neglecting to waterproof the cables, leaving network and power cable ports exposed and risking rust and water damage, rendering the cameras useless.
Tips for maintaining your security camera systems
- Make sure that cameras are rated for IP65, IP66 or IP67, especially when installing outdoors. It Indicates they are waterproof and can withstand various environmental conditions i.e. dust.
- Position the cameras strategically, considering the maximum field of view, angle of coverage, and distance limitations.
- Install cameras at suitable heights(at least 10 feet) to prevent tampering/theft or interference of nature.
- Consider the camera's field of view, angle of coverage, and potential obstructions like trees or walls.
- Also consider the lighting conditions, avoiding direct exposure to strong light sources & placing in dark shady areas.
- Use high-quality outdoor-rated Ethernet cables. Utilize weatherproof couplers or grommets to maintain weather sealing connection.
- Use plastic or metal junction box & cover plates to create a clean and professional-looking installation. Securely attach the camera to the cover plate for a stable installation.
- Use wire cable clips or plastic cable covers(optional) for wire management and protection.
Common mistakes while installing security cameras
- Installing infrared cameras in the wrong places or areas where the infrared beams are blocked, resulting in overexposed images in low light conditions.
- Forgetting to remove the protective film or foam from the camera, leading to image clarity problems after installation.
- Setting up cameras at an incorrect angle, wasting the field of view and compromising security.
- Ignoring distance limits of wires, exceeding the maximum distance of 100 meters for UTP cabling over Ethernet, which can cause data and power loss.
- Neglecting to waterproof the cables, leaving network and power cable ports exposed and risking rust and water damage, rendering the cameras useless.
Maintain your security camera systems:
- Keep the camera lenses clean and free from dirt, dust, or debris that may obstruct the view. Use a soft cloth or lens cleaning solution recommended by the manufacturer for cleaning.
- Periodically check for firmware updates provided by the camera manufacturer. Install any available updates to ensure your camera has the latest features, bug fixes, and security enhancements.
- Keep an eye on the camera's network connectivity and performance. Monitor the camera's status within your network management tools or camera-specific software to detect any issues or disruptions.
- If using an NVR or other storage options, regularly manage and review the recorded footage to ensure proper storage allocation and to free up space as needed.
- Consider implementing backup and redundancy measures for critical video footage. This may involve regular backups of recorded footage to off-site storage or utilizing redundant storage systems to prevent data loss.
Conclusion:
By selecting cameras designed for outdoor or indoor use, positioning them strategically, using high-quality cables, and considering lighting conditions, you can optimize the effectiveness of your surveillance system.
Regular inspections, cleaning, and tightening of components ensure continued functionality and image quality. Additionally, protecting network equipment and ensuring its suitability for outdoor use or providing weatherproof enclosures contribute to the longevity of your system.
By following these installation and maintenance guidelines, you can have a robust and reliable POE security camera system that provides enhanced security and peace of mind.
If you still have any queries ask us in the comments.


